If you’ve ever wondered what really happens behind the scenes when your Laravel app receives a request, you’re not alone. Laravel’s request lifecycle is one of those topics that feels complex at first—but once you understand it, it becomes a powerful tool for debugging, optimization, and customization.
Let’s walk through it step by step, starting with the very first file that runs.
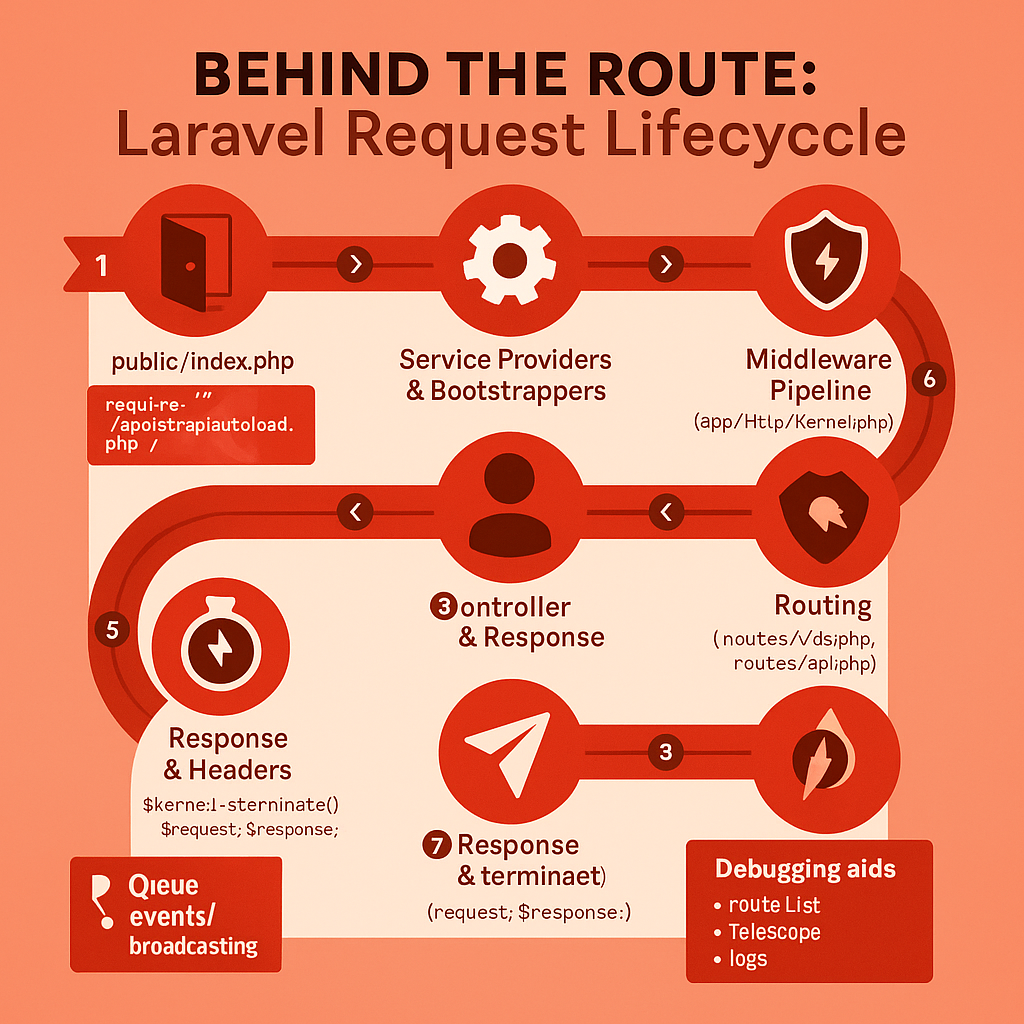
1. The Entry Point: public/index.php
Every request to your Laravel application starts here. Think of public/index.php as the “front door” of your app. Its job is simple: bootstrap Laravel and hand over the request to the framework.
Here’s a simplified view of what it does:
require __DIR__.'/../bootstrap/autoload.php';
$app = require_once __DIR__.'/../bootstrap/app.php';

$kernel = $app->make(Illuminate\Contracts\Http\Kernel::class);

$response = $kernel->handle(
    $request = Illuminate\Http\Request::capture()
);

$response->send();
$kernel->terminate($request, $response);
So in short:
- It loads Composer autoload.
- Boots the Laravel app.
- Hands the request over to the HTTP Kernel.
- Finally, it sends the response back to the browser.
2. Application Bootstrap: bootstrap/app.php
Inside bootstrap/app.php, Laravel creates the main application instance and binds important interfaces.
This is also where Laravel decides: Am I running as a console app (artisan) or as a web app (HTTP)? Depending on that, it loads the right kernel.
In other words, this file sets the stage for everything else.
3. Service Providers & Bootstrappers
Now the fun part begins.
Service Providers are the backbone of Laravel. You’ll find them listed in config/app.php, and their role is to register all the services your app needs—database, routes, queues, and so on.
Each provider has two key methods:
register(): Bind things into the service container.boot(): Do the setup work once everything is registered.
Example:
public function register()
{
    $this->app->singleton('CustomService', function ($app) {
        return new CustomService();
    });
}

public function boot()
{
    CustomService::initialize();
}
Meanwhile, bootstrappers handle things like loading configuration, setting up error handling, and preparing facades.
4. The HTTP Kernel
Think of the HTTP Kernel (app/Http/Kernel.php) as the conductor of an orchestra. It manages:
- Middleware registration (both global and per-route).
- Dispatching the request through that middleware pipeline.
- Sending the request to the router, which eventually reaches your controller.
Example of global middleware in the Kernel:
protected $middleware = [
    \App\Http\Middleware\CheckMaintenanceMode::class,
    \Illuminate\Foundation\Http\Middleware\ValidatePostSize::class,
    \App\Http\Middleware\TrimStrings::class,
    \Illuminate\Foundation\Http\Middleware\ConvertEmptyStringsToNull::class,
];
5. The Middleware Pipeline
Middleware are like layers of an onion. Each one can do something before and after the request moves through.
A simple middleware looks like this:
public function handle($request, Closure $next)
{
    // Before the request hits the controller
    $response = $next($request);

    // After the controller sends a response
    return $response;
}
Global middleware always runs, while route middleware only applies when that route is matched.
6. Routing & Controller Dispatch
Once middleware has done its job, the router steps in. It checks your route files (routes/web.php or routes/api.php) and decides what to do with the request.
It can either:
- Run a closure directly, or
- Send the request to a controller method.
Example:
Route::get('/users/{id}', [UserController::class, 'show']);And thanks to Laravel’s service container, any dependencies you type-hint in your controller’s constructor or methods are automatically resolved.
public function __construct(UserRepository $userRepository)
{
    $this->userRepository = $userRepository;
}
7. Generating & Sending the Response
Now the controller (or closure) returns a response—HTML, JSON, or even a file download.
Before the response reaches the browser, it passes back through middleware one last time, giving you a chance to modify it (like adding headers).
Example:
$response = response()->json(['message' => 'Hello, Laravel!']);
return $response->header('X-Custom-Header', 'Value');
8. Kernel Termination
Once the response is sent, Laravel isn’t quite done. The kernel calls terminate(), which is where background tasks like logging or queue processing can run.
This ensures your user doesn’t wait around for those tasks before getting their response.
9. Optional Extensions Along the Way
During the lifecycle, Laravel might:
- Queue jobs for background processing.
- Fire events to notify other parts of the app.
- Broadcast data in real-time to clients.
These aren’t always part of a request, but they hook into the lifecycle seamlessly.
10. Debugging Tips
If you’re trying to debug something inside the lifecycle, here are a few go-to moves:
- Service Container:
dd(app()->make('ServiceName')); - Middleware pipeline: Drop logs inside
handle()methods. - Routes:
php artisan route:listis your best friend. - Deeper insights: Use Laravel Telescope to see exactly what’s happening.
Wrapping Up
Laravel’s request lifecycle might feel complex at first, but once you break it down it’s actually pretty elegant. From the raw HTTP request hitting index.php all the way to the final response, each phase has a clear purpose: bootstrapping, service providers, middleware, routing, and finally response handling.
By mastering this flow, you’ll be able to:
- Debug issues faster.
- Customize Laravel to fit unique project needs.
- Write cleaner, more performant code.
At the end of the day, understanding the lifecycle isn’t just about theory—it makes you a more effective Laravel developer, ready to take full advantage of everything the framework offers.
Leave a Reply